Rules Tool – Editing a Rule
After adding a rule, you can open and modify if by double-tapping it or by clicking the wrench icon.
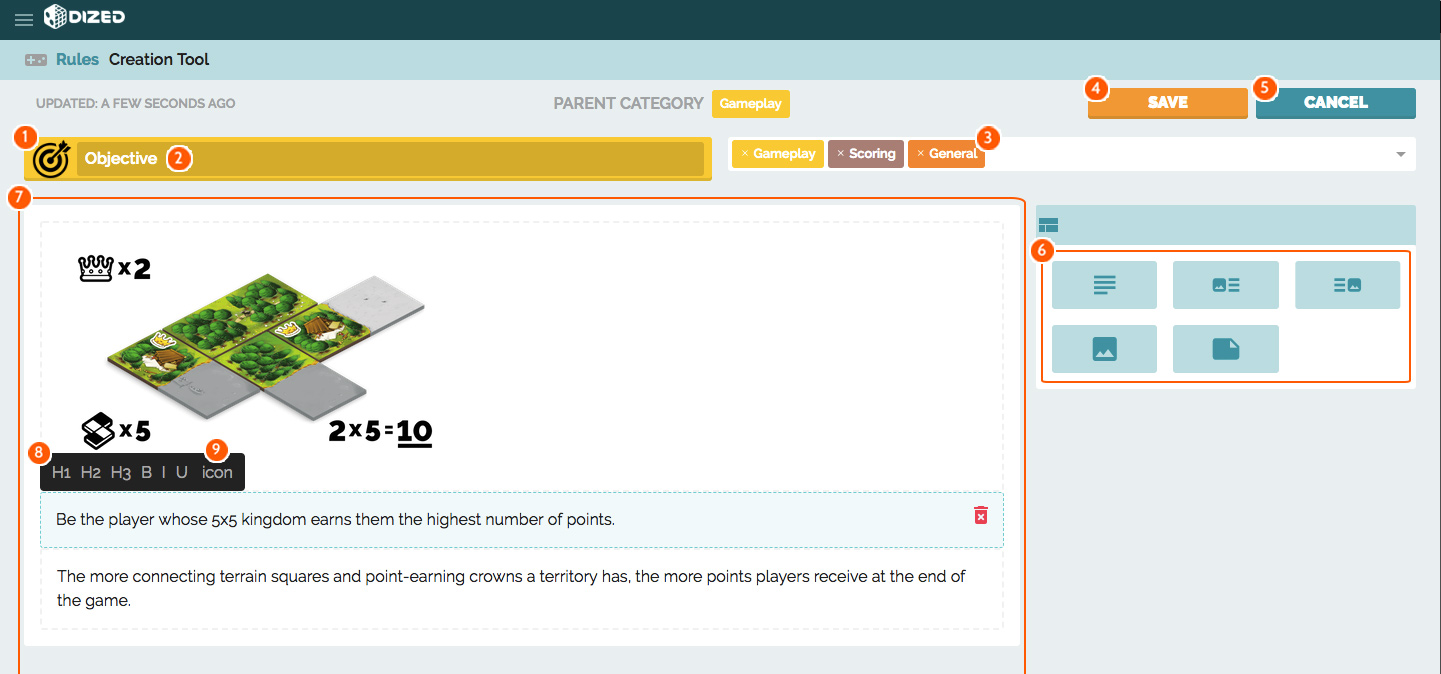
You’ll enter the rule editor view you can see below.
- Click on the icon to change it
- Edit the title of the rule directly in the Title bar
- Add or remove categories (a rule can be under more than one categories if needed).
- Save the rule and go back to the Rules list. Note, this doesn’t save the project. So click save draft in the main view as well!
- Discard any changes and go back to the Rules list
- Drag and drop layouts to the content zone on the left
- Text
- Text with an image on the left side
- Text with an image on the right side
- Image (see Graphical Assets page for specifications)
- If you want to include an example or a quote inside the rule, you can use this.
- Edit, move and delete Rule texts and images directly from the Content zone
- Format texts with Heading Styles, Bold, Italics or Underligning
- Insert inline images (see Graphical Assets page for specifications)
You can use these same graphics for concepts, items, or symbols, etc. as you may have done in your printed rulebook
Don’t forget to use Caterogies to organize your rules – it will make them easier for you to filter and for users to browse.

