Rules Tool – Categories
Categories are how we divide rules into manageable sections.
Each Category can (and should) contain several Rules in it. Each Rule must belong to at least one Category, but often belongs to multiple.
The Main View
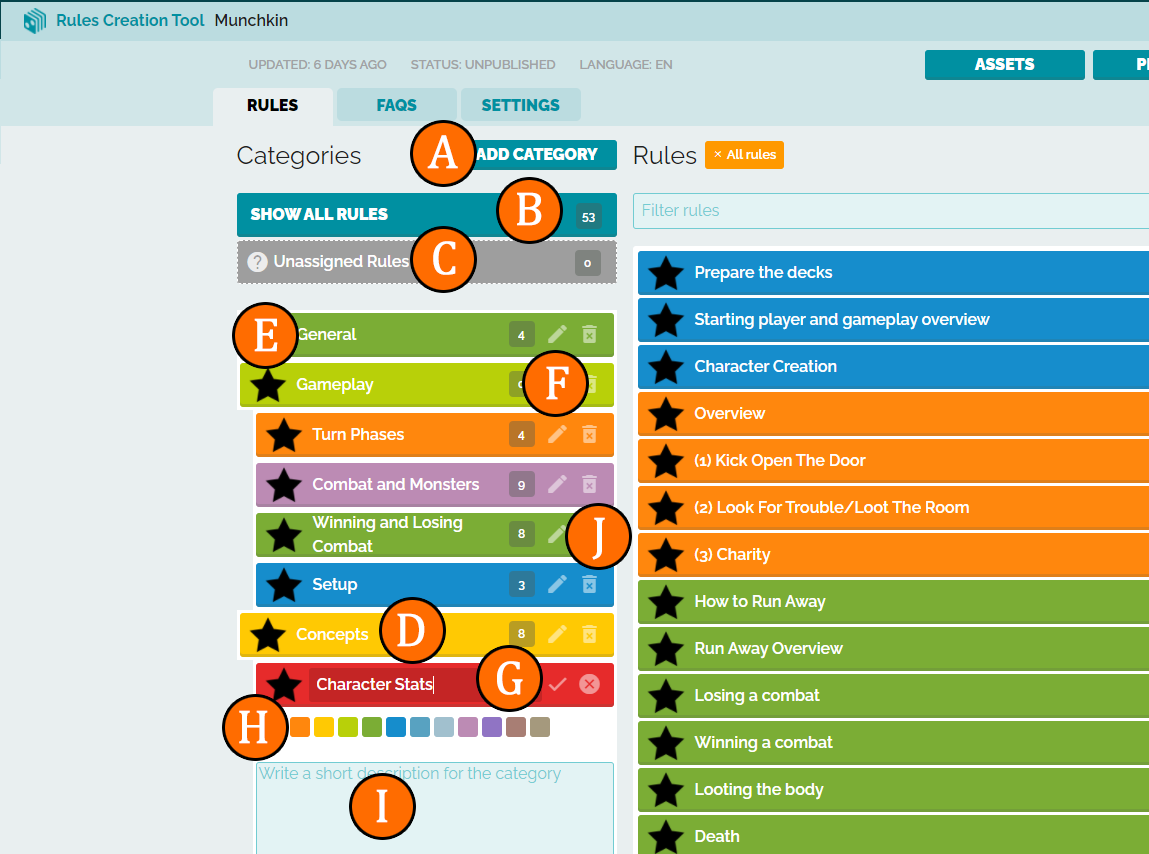
- Add a new Category
- Show Rules from all Categories
- Show all Rules without a Category
- Click on a Category to display only Rules from this Category
- Click on an Icon to edit it – the default icon for a Category is a star
See Graphical Assets for specifications - Click on the Pencil icon to start Editing a Category
- While editing, edit the name of the Category
- While editing, click on a color box to change the color of the Category
- While editing, edit the description of the Category
- Click on the Trashcan icon to delete a Category
Name
Category name should be fairly short, we recommend about 1-3 words.
Icon
These are small icons displayed next to the category (or rule) name. Specifications for these icons can be found in the graphical assets page.
Description
A short description of the category. This short description will not be referenced anywhere else! The description is for players who are uncertain about what the category is to have a better understanding of it.
Keep the description short – around 1 to 2 sentences.
Category Colors
Category colors allow for users to find their information faster. All rules created under that category will have that same color. So if you have a red category called “strategies” all the strategies created under it will be in red color in the app.
Moving Categories
You can drag and drop categories to change the order they’re shown in the app.
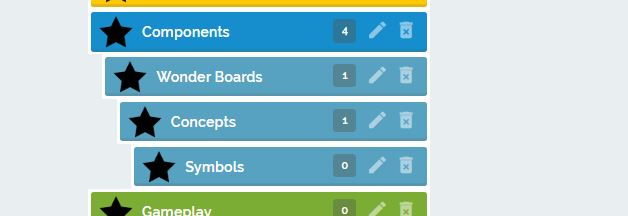
Subcategories
By just moving a category on top of another one, you can make it a sub-category, creating a new menu level in the app. The tool supports 4 sub categories to help organizing the rules better.
You can also create a sub-category, by selecting the parent category first and then clicking “add category” button.


