Content Editor – Cameras
You can control the placement and angle of the camera in your tutorial discretely in every single block. There are also preset camera angles available to get you started.
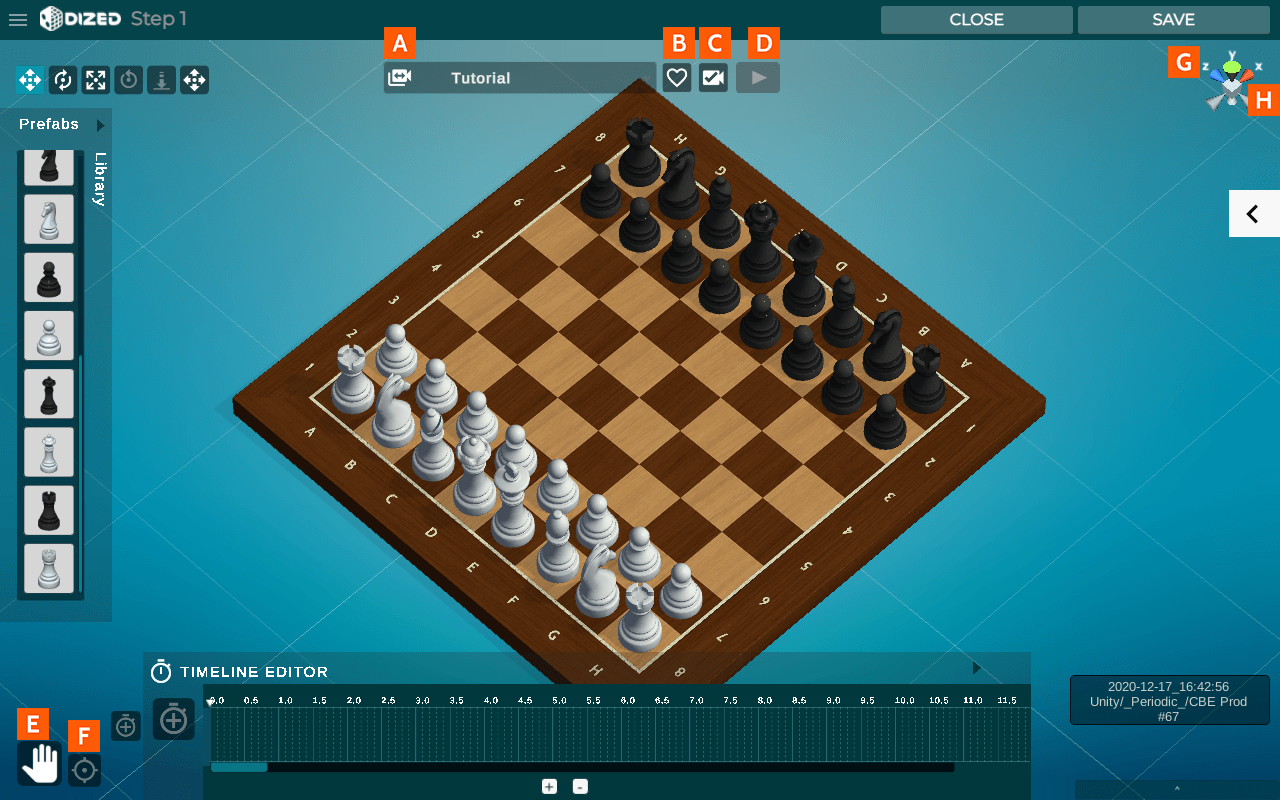
Camera Angle Menu
Use this menu to select a preset camera angle
Save Custom Angle
Save the current camera angle. This setting is temporary for the length of time you have the block open for editing
Save Tutorial Angle
Save the Tutorial camera angle. This button will apply the current camera settings and it will be the camera setting the user will see.
Preview Timeline Animation
Save the Tutorial camera angle. This button will apply the current camera settings and it will be the camera setting the user will see.

Pan Camera
Shortcut: Q
Pan the camera around the stage. You may choose to skip this icon as more advanced camera manipulation tools are available through mouse and keyboard input
Focus on Selected
Focus the camera on the currently selected object(s). The camera will reposition, at it’s current angle, to bring the objects fully visible in the center of the screen. The camera may move closer or farther away from the selected objects to achieve this.
- Camera Angle Quick Selector
- Save Custom Angle
- Save Tutorial Angle (Setting this changes the content
to be viewed from the current camera location). - Preview button for playing the animation in the editor
- Pan Camera (Q) allows moving the camera around.
This option is not fully needed as same options are available as follows:- Move Camera horizontally and vertically: Press Mouse Wheel + Move Mouse
- Move Camera forwards/backwards: Roll Mouse Wheel Scroll In/Out
- Rotate Camera: Hold ALT + Hold LMB + Move Mouse
- Focus Camera to selected object. This makes selected object the center of the camera view point. Camera can then be rotated around this point.
- Viewpoint shortcut. Selecting a cone switches the camera to a straight angle from
the selected axis (X, Y, Z) - Selecting Persp or the cube in the middle switches between perspective
and isometric views.

